Building a Website with Github Pages
So, you’ve got something to say? A project you’re excited about? Or maybe just a burning desire to share your thoughts with the world? Starting a blog can seem like a huge undertaking, but it doesn’t have to be. So let’s do this together! In this post, I’ll walk you through the process of launching your own website, leveraging the power of GitHub Pages and the flexibility of Jekyll to build a functional blog incredibly easy.
What is GitHub Pages?
GitHub Pages is a free service offered by GitHub that lets you host static websites directly from your GitHub repositories. You don’t need to worry about servers or complex hosting setups. Just upload your website files to a public GitHub repository, and GitHub Pages will handle the rest.
What is Jekyll?
Jekyll is a static site generator. It is a tool that takes your content (written in Markdown) and transforms it into a fully functional website. It’s also supported by a vibrant and helpful community, offering plenty of resources and support for new users. It’s a fantastic option for those of us whose graphic design skills peaked with MS Paint
Part 1 - The Basics
Signing up for GitHub
First and foremost, you are going to need a GitHub account. You can use the link below to sign up:
Once you’ve created your account you’ll want to create a new repository. Make sure you set the repository name to be *username*.github.io. You’ll also want to set this repository to be public.

Installing Git for Windows
After you’ve created your repository you will want to install Git on your computer. You could opt for the GitHub Desktop app but I’m going to stick with Git for Windows for this tutorial. It can be downloaded at the link below.
Note: I recommend setting Visual Studio Code to be the default editor for Git.
You can verify that Git is installed by running git -v. If Git is installed then it will display the current installed version.
1
2
> git -v
git version 2.49.0.windows.1 # indicates a successful install
Now that you have Git installed, let’s take care of some housekeeping. You will need to set your username and email for Git. Setting your username and email in Git is essential for proper authorship tracking, collaboration, and attribution. Use the following commands to set your identity.
1
2
git config --global user.name "pwshmode" # use your username
git config --global user.email "pwshmode@proton.me" # use your email
Clone Your Repository
Now you want to clone the repository that you created earlier.
1
git clone https://github.com/username/username.github.io.git
Now you have a directory on your local machine that contains all of your repository’s files. (Which is not really anything at this point.)
Let’s go ahead and create a basic index.html file:
1
2
3
4
5
6
7
8
9
<!DOCTYPE html>
<html>
<body>

<h1>Bob Loblaw's Law Blog</h1>
<p>Hello World!</p>

</body>
</html>
Now add your changes in git.
1
2
3
4
5
# Adds all files
git add .

# You can check that the index.html file is added with
git status
Commit your changes and add a message (if you didn’t set your identity earlier it will inform you about that now).
1
git commit -m "Added index.html"
You are ready to push your changes now!
1
git push origin main
You may be prompted to sign into GitHub if you haven’t already done so.
Congratulations! You’ve made your first GitHub Pages website and it’s beautiful.

(Note: beauty is subjective). You could stop there, but where is the fun in that?
Part 2 - Introducing Jekyll
Please be sure to delete your previous repository so that you can create a new one using a template.
I mentioned earlier that Jekyll is a static site generator and it has a thriving community. We want to take advantage of the graphic/web design prowess of others that have come before us. They’ve so generously contributed their work and it would be a shame not to use it. There is a whole slew of themes out there free for the taking. You can find some popular ones on GitHub:
Creating a repository from a template
For this demonstration I will be using the Chirpy theme. There are lots of great notes about how to get started with this theme.
The developer suggests using the chirpy-starter template. If you deleted the repository from earlier you can go ahead and click Use this template, Create a new repository, and set the name to username.github.io.
Installing dependencies
Now you are going to need to prepare your development environment. This theme offers two different ways: Dev Containers or setting it up natively. While Dev Containers are recommended for Windows, for the sake of this tutorial we are going to install the necessary prerequisites and go from there. Here is the full documentation for installing Jekyll on Windows if you are interested.
Installing Ruby
Download the Ruby+Devkit installer from RubyInstaller Downloads. (v3.3.8-1 is the latest recommended installer at the time of this post).
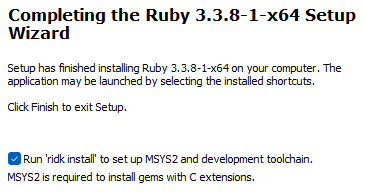
Be sure the Run ridk install option is selected when Ruby finishes installing.
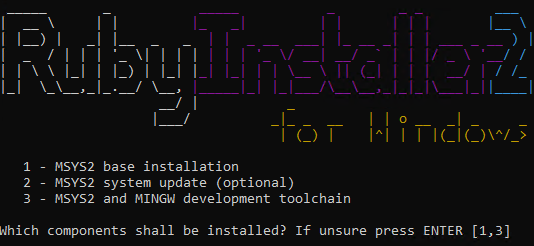
Press ENTER when selecting the components to install the MSYS2 base installation and the MINGW development toolchain.

You can verify that Ruby is installed by opening a new terminal window and running ruby -v. That will return the version of Ruby that you installed.
Installing Jekyll
You can install Jekyll by running:
1
2
3
4
gem install jekyll bundler

# Verify that jekyll is installed
jekyll -v
Now that your dependencies are installed let’s move on to building the website.
Clone your repository and start building your website
Let’s clone the repository to pull down the files from the template we grabbed earlier.
Note: You will need to delete the local repository directory from the earlier example or clone this in a different location.
1
2
3
4
5
6
7
git clone https://github.com/pwshmode/pwshmode.github.io.git

# Change directory
cd .\pwshmode.github.io\

# Open the directory in VSCode for ease of editing
code .
Install theme dependencies
For this particular theme you will need to run bundle in the root of your repository to install additional dependencies.
Start your local server
Now that the dependencies are installed we can take a sneak peak at what our website looks like.
1
bundle exec jekyll s
Your local website will be available for viewing at 127.0.0.1:4000
We could push these changes up to Github and view the site but let’s add some information first.
Edit _config.yml
1
2
3
4
5
6
7
8
9
10
timezone: America/Chicago
title: Bob Loblaw's Law Blog
tagline: You don't need doubletalk, you need Bob Loblaw
description: A law blog by Bob Loblaw Law Firm
url: "https://pwshmode.github.io"
github:
	username: pwshmode
social:
	name: Bob Loblaw
	email: pwshmode@proton.me
We can view changes by stopping the previous server instance and running
bundle exec jekyll s. Be sure you have saved your_config.ymlfile.
Create your first post
Under _posts we want our first “real” post. Create a file and use the following format for the name YYYY-MM-DD-title.md. Now let’s add in the frontmatter and content.
What is front matter? In Jekyll, frontmatter is a special section at the very beginning of a Markdown or text file (usually a blog post, page, or other content file). It’s enclosed between three dashes (
---) at the top and three dashes again at the bottom. Think of it as a metadata header for your content.
1
2
3
4
5
6
7
8
9
10
11
12
13
14
15
16
17
18
---
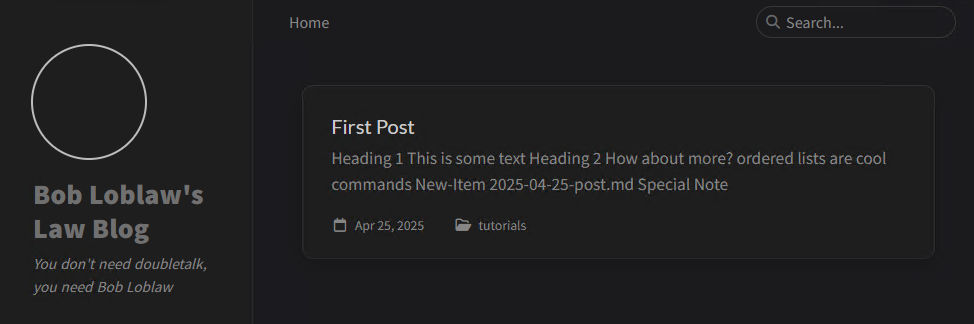
title: First Post
date: 2025-04-25 12:16:10 -0500
categories: [tutorials]
tags: [blog,jekyll]
---
# Heading 1
This is some text
## Heading 2
How about more?
- lists
- are
- cool
We can now refresh our browser and see our new post.
You can also preview the markdown file directly in VSCode by selecting the preview icon.
Push your changes to GitHub
Stage your changes:
1
2
# Stages all modified files
git add .
Commit your changes and add a message:
1
git commit -m "Added new post"
Push your changes up to GitHub:
1
git push
View your new post
After pushing your changes and waiting just a bit, navigate to your github pages URL to see it in action!
Note: You may need to clear your browser’s cache if the content hasn’t updated.
You want to know something really cool about this process? The build orocess for your webpage was done through GitHub Actions. You can see this process by navigating to the Actions tab under your repository.
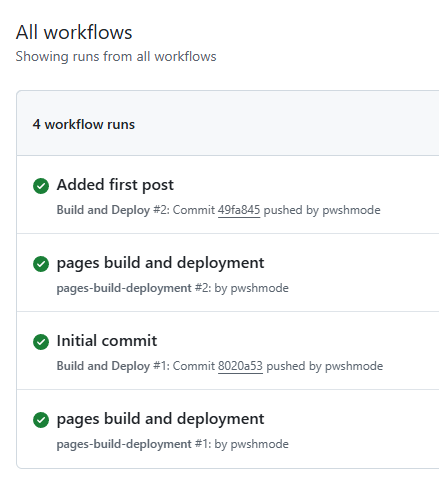
This theme contained a workflow that automatically builds our site using jekyll build and deploys the results to GitHub Pages. This eliminates the manual build and deployment steps for us. You can find the “workflow” under .github\workflows\pages-deploy.yml. If you push changes and your site isn’t updating, remember to check here for the error logs!
My next post will cover how to utilize the popular notetaking app Obsidian to write posts for your website.