From Obsidian Vault to Static Site: Automating with PowerShell & Jekyll
This tutorial is a continuation of my “Building a Website with GitHub Pages” post found here.
Obsidian is a fantastic tool for note-taking and personal knowledge management. But what about sharing that knowledge? While Obsidian offers publishing option, I’m going to show you how I use a PowerShell script to synchronize my Obsidian vault to a Jekyll-powered website hosted with GitHub Pages.
Setting up your environment
Download Obsidian
Download the latest version of Obsidian from their website.
Create a new vault
Create a new vault in your desired location.
Create new directories in the vault
- Create a folder named
posts - Create a folder named
assets- Create a subfolder named
img
- Create a subfolder named
- Create a folder named
templates
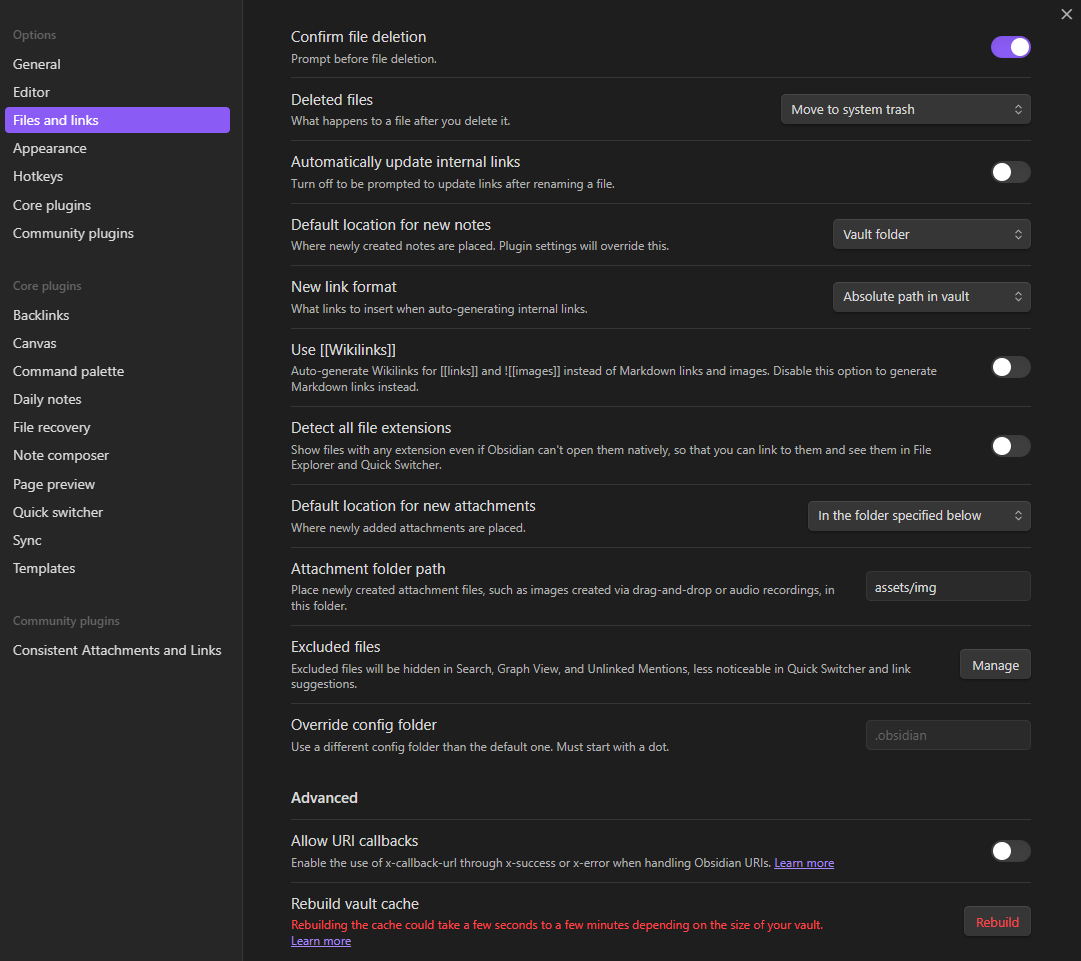
Update Obsidian Settings
Files and Links
- Change New Link Format to
Absolute path in vault - Uncheck
Use [[Wikilinks]] - Set the Default ocation for new attachments to be
In the folder specified below- Set the Attachment folder path to be
assets/img
- Set the Attachment folder path to be
Your settings should look something like this:
Templates
Set your Template folder location to templates

Create a new template
Create a new note and name it Blog Template or whatever you would like to call it. We are going to use this template to bootstrap our posts with the necessary frontmatter that Jekyll requires. You can start creating properties by typing --- at the top of your new note.

Create the following properties:
- Title (leave empty)
- Date (
-0500)- You can adjust the offset to match your location
- Categories (leave empty)
- Tags (leave empty)
When you are finished it should look like this:
 You can add other things to your templates if you’d like but we are going to leave it at that for now.
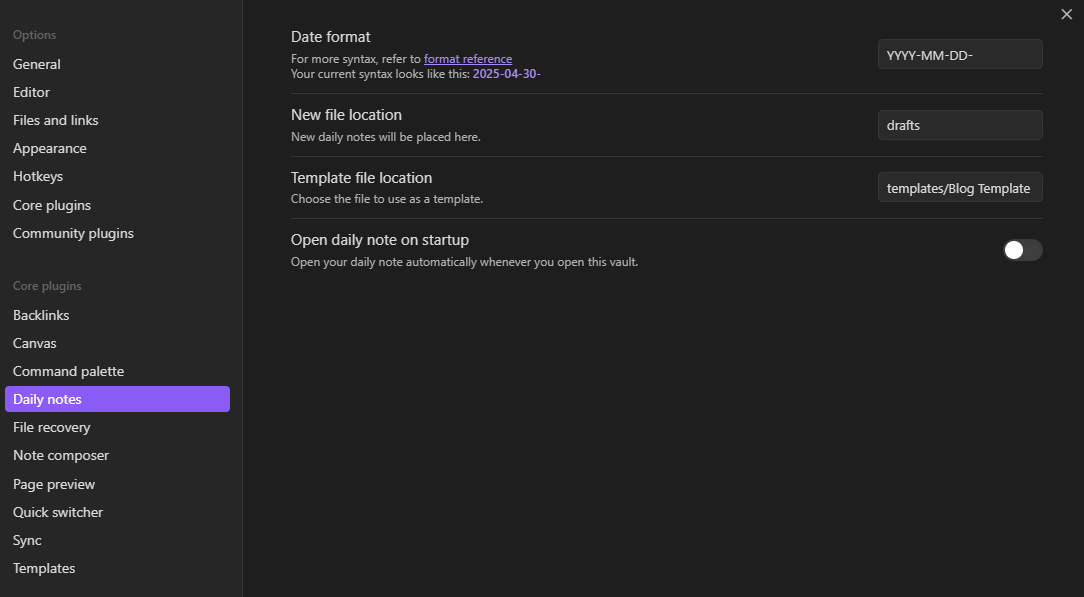
Back to the settings
We are going to leverage the built in Daily notes plugin to help us create a new blog post and call the template we just created.
- Change the Date format to
YYYY-MM-DD- - (Optional:) Change the New file location to
drafts(or another desired folder) - Change the Template file location to
templates/Blog Template
Writing Your First Post with Obsidian
Now that all of the settings are out the way, you are ready to create your first post with Obsidian.
Open today’s daily note.
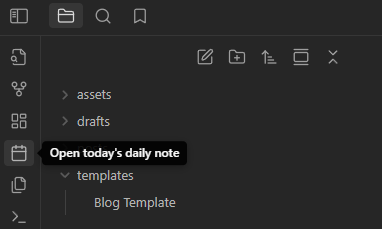
You will see a note similar to the one below:

Add in your title, categories, and tag and start writing your post!
Using PowerShell to Sync Your Vault to GitHub
There are definitely some better options out there, however I wanted to challenge myself to use PowerShell to automate my website deployment process.
The script automates the following tasks:
- Post Synchronization: Copies posts from a local Obsidian vault directory to a remote repository.
- Image Synchronization: Copies images referenced in the posts to the same repository and encodes the image file names.
- Stale Image Removal: Removes images from the repository that are no longer referenced in the published posts.
- Git Commit and Push: Commits the changes to the repository and optionally pushes them to a remote repository.
The script can be found on my GiHub here.